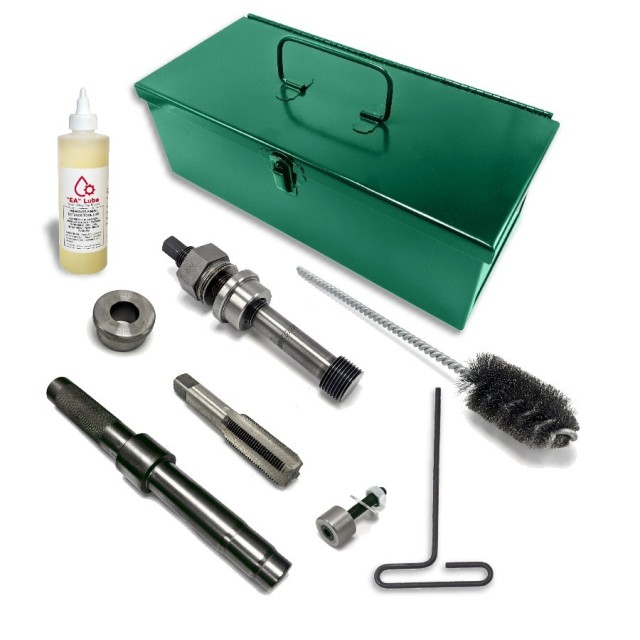
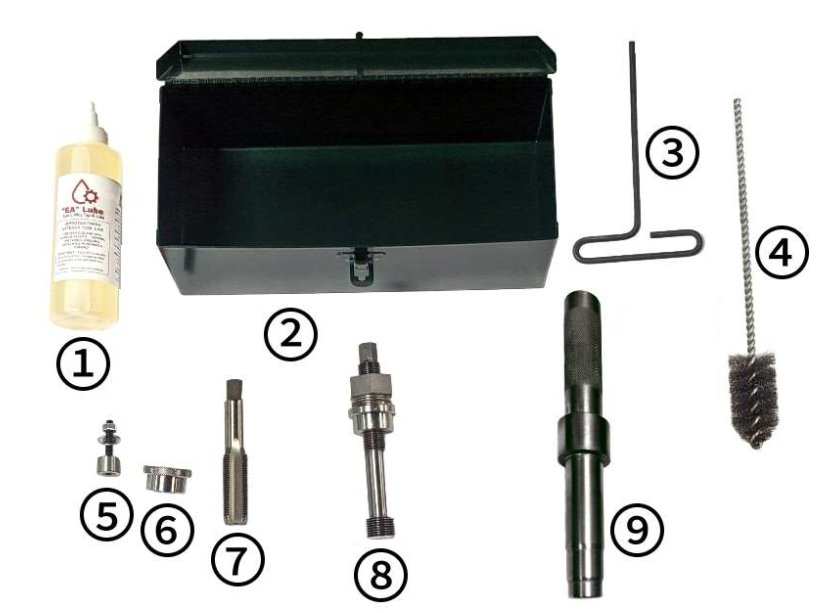
The Complete PACCAR MX-13 Series Kit with Toolbox 450-6331-00
Image #
Description
Part #
1
“EA” Tap & Lube (8oz)
468-9910-08
2
Small Metal Tool Box
467-1950-25
3
Hex T-Handle Wrench for Tube Clamp Assembly
467-1612-03
4
Casting Cleaning Brush (Carbon Steel)
450-6951-02
5
Injector Tube Clamp Assembly
423-6334-40
6
Tap Guide Bushing
423-6331-32
7
Tap
423-6334-14
8
Removal Tool
423-6334-30
9
Drive in Tool
423-6332-10
10
Instruction Manual (not shown)
451-3550-06
ADDITIONAL CONSUMABLE ITEMS AVAILABLE
Description
Part #
PACCAR MX-13 Stainless Steel injector Sleeve with O-Ring
423-6392-05
Permatex (#64000) High Heat Sealant (Sleeve Retainer)
468-9640-00
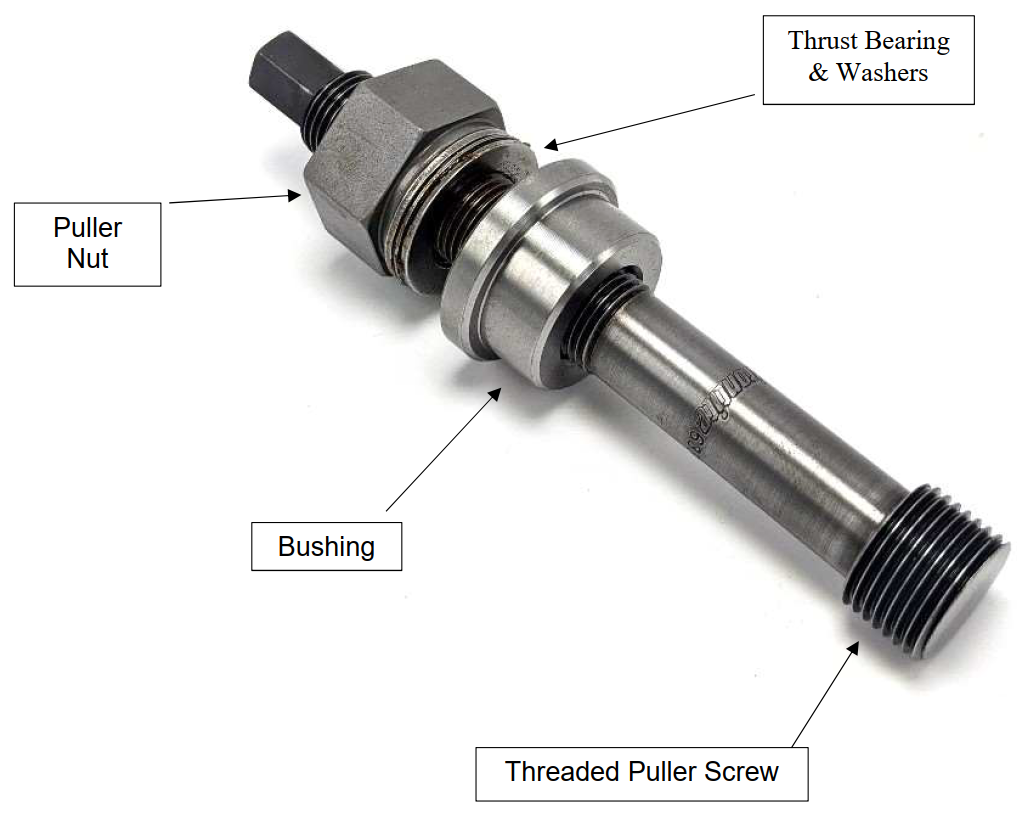
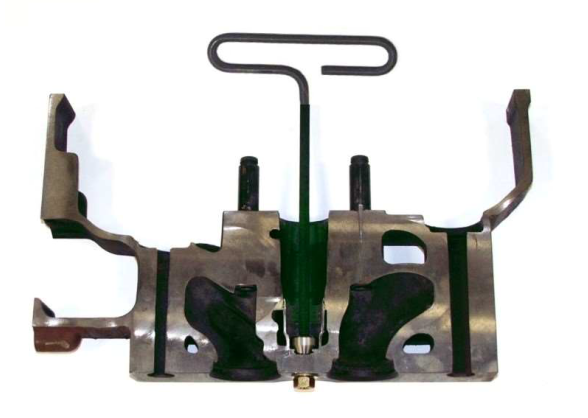
Components of the Removal Tool
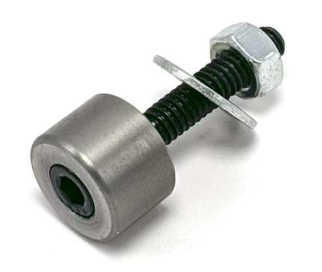
Tube Clamp Assembly
To install, remove nut and washer from the bottom and insert down into the old sleeve so that the threads appear out the other side. Replace the washer and nut. Hold the nut with a wrench and use the provided T-handle Allen Wrench down inside the old sleeve to tighten this clamp assembly to prevent the old sleeve from turning.
Sleeve Removal
With valves removed, install the injector sleeve tube clamp (423-6334-40) though the inside of the sleeve. Install washer and nut onto stud sticking out from face of head and tighten with t-handle wrench (467-1312-03).
The injector tube clamp assembly will keep the sleeve from turning while tapping the sleeve.
Using tap (423-6334-14) and tap guide bushing (423-6331-32), lubricate the tap with “EA” Lube (468-9910-08) while tapping the injector sleeve about 3/8” to 1/2” deep.
Unbolt and remove the injector sleeve tube clamp assembly.
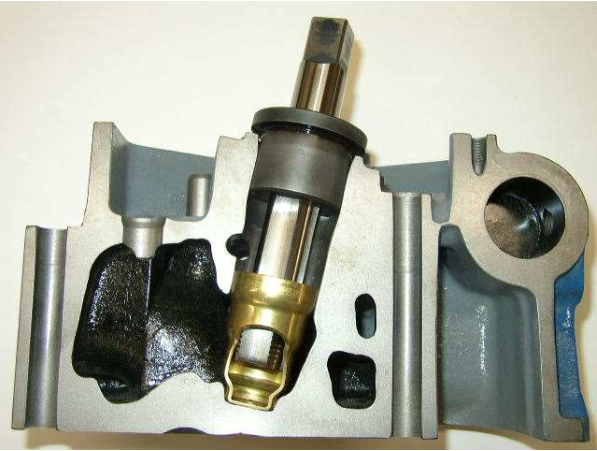
Insert the assembled sleeve remover (423-6334-30 shown on pg 3.) threaded puller screw down into the old sleeve. Thread the puller screw into the sleeve until it grips the sleeve tightly with the threads. Then reverse ½ turn to relax the threads allowing the sleeve to be much easier to remove from cylinder head and later the tool itself.
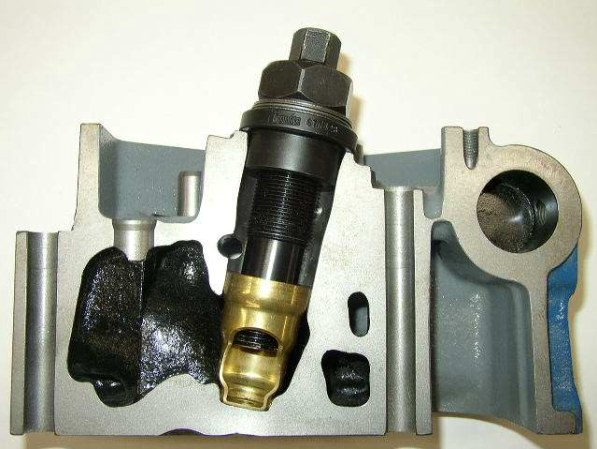
With the bushing in place between the puller nut and the face of the casting, and with the thrust bearing and the two thrust washers between the puller nut and the bushing, tighten the puller nut. This will pull out the old sleeve from the casting as shown below.
Sleeve Installation
Use the carbon steel brush (450-6951-02) to clean the inside of the injector sleeve bore being sure to remove the old “O” ring and replace it with a new one, applying clean engine oil when doing so.
Apply a small amount of Permatex (64000) high heat sealant (sleeve retainer) or equivalent to lower nose section of the injector sleeve providing coverage all the way around the nose of the sleeve.
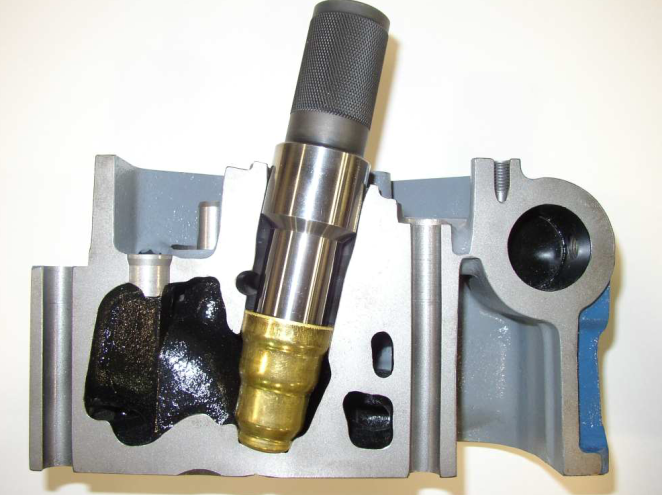
Use the Sleeve Drive-In Tool (423-6332-10) and a hammer to drive the Sleeve to the bottom of the casting. The sound of hammering will change when the sleeve is fully seated.